前言
初学 pve,搭建方式非常简单,但创建 vm 时默认使用 iso,这样使用起来比较麻烦,还是喜欢使用 OpenStack 那种直接使用镜像去创建 vm 的感觉。 研究了下,在 pve 中可以通过模板去创建 vm,个人理解和 vmware 是类似,所以总结了创建 ubuntu 24.04 模板的过程
制作模板
下载 ubuntu 模板到 pve 主机上
下载地址:https://cloud-images.ubuntu.com/noble/current/
创建 vm,导入镜像
#!/bin/bash

VM_NAME=noble-24.04-template
VM_ID=9008
VM_CORES=2
VM_MEM=8192
VM_IMAGE=noble-server-cloudimg-amd64.img
VM_DISK=200G

qm create $VM_ID --cores $VM_CORES --memory $VM_MEM --name $VM_NAME --net0 virtio,bridge=vmbr0

# 导入下载的镜像到local-lvm 存储空间
qm importdisk $VM_ID $VM_IMAGE local-lvm

# 将导入的磁盘以 scsi 方式挂载到虚拟机上面
qm set $VM_ID --scsihw virtio-scsi-pci --scsi0 local-lvm:vm-$VM_ID-disk-0

# 添加 Cloud-Init CDROM 驱动(必须添加这个vm才能启动cloud-init)
qm set $VM_ID --ide2 local-lvm:cloudinit

# resize 磁盘
qm resize $VM_ID scsi0 $VM_DISK

# 设置启动
qm set $VM_ID --boot c --bootdisk scsi0
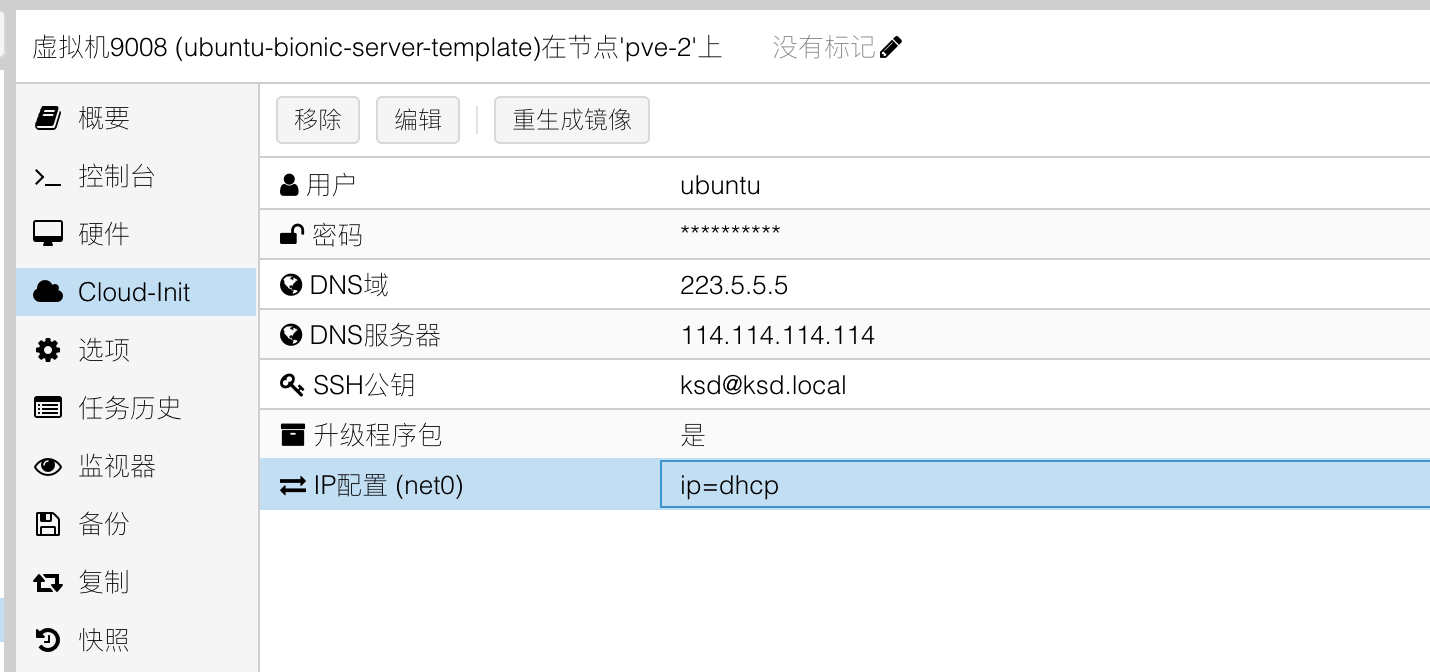
设置 cloud-init
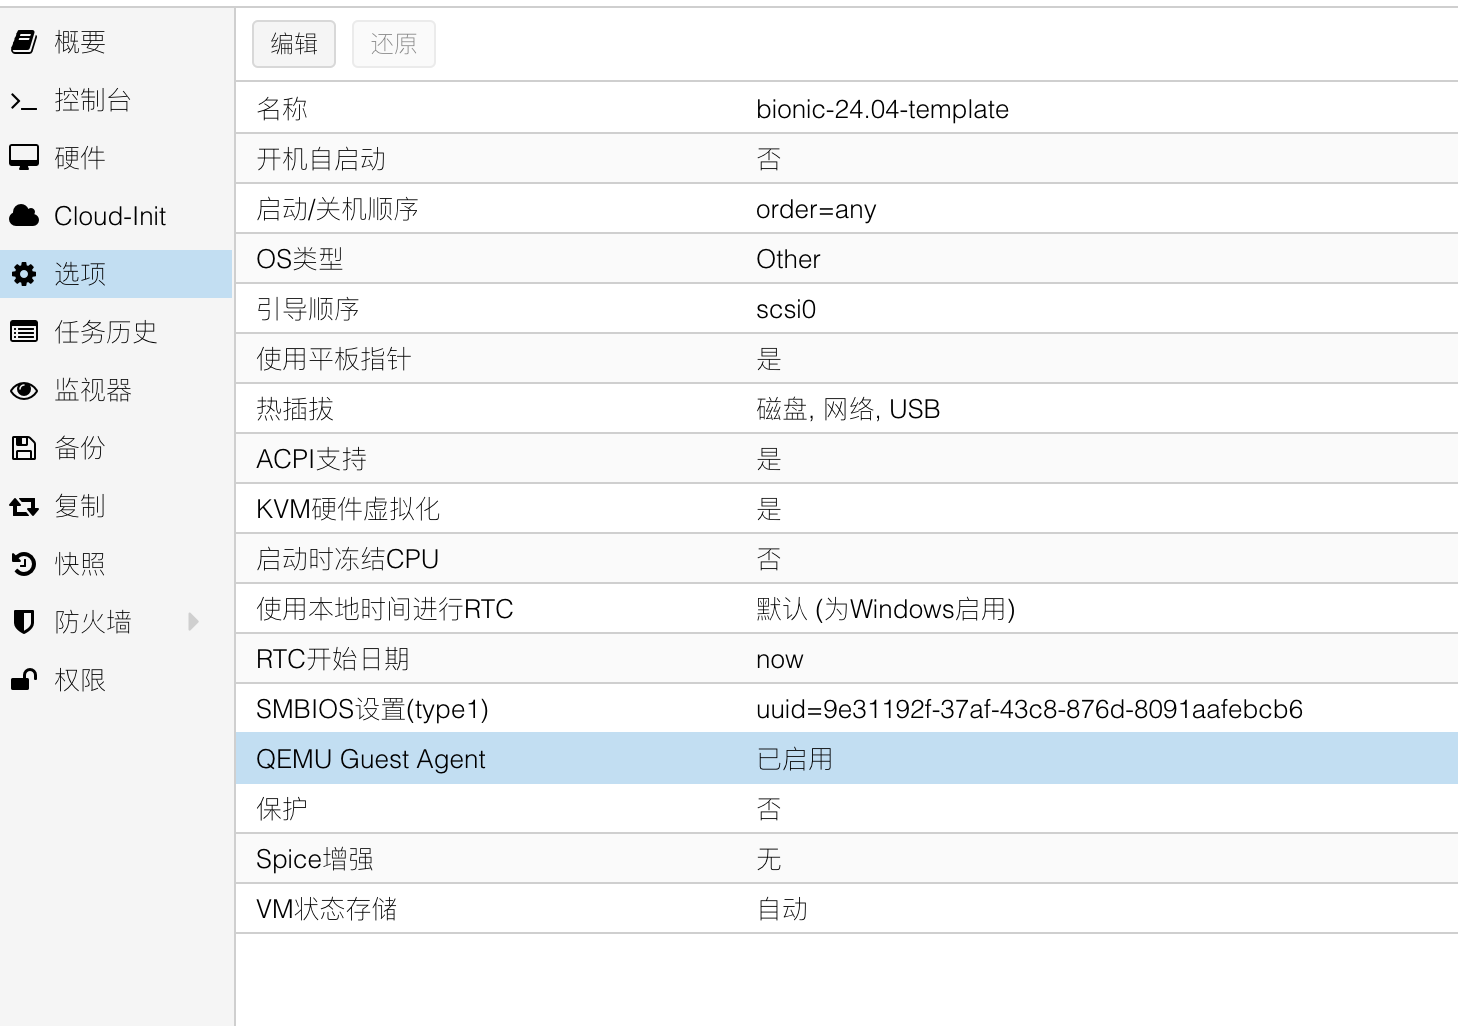
启用 QEMU Guest Agent
开机,修改虚拟机相关配置
- 修改时区:
timedatectl set-timezone Asia/Shanghai
- 修改 apt 源为阿里源
cat /etc/apt/sources.list.d/ubuntu.sources
# 阿里云
Types: deb
URIs: http://mirrors.aliyun.com/ubuntu/
Suites: noble noble-updates noble-security
Components: main restricted universe multiverse
Signed-By: /usr/share/keyrings/ubuntu-archive-keyring.gpg
- 安装 qemu-guest-agent
apt update apt install qemu-guest-agent systemctl start qemu-guest-agent systemctl enable qemu-guest-agent - 注释掉 apt 的配置,否则会继续沿用默认的 apt 配置
vi /etc/cloud/cloud.cfg
# - apt_configure
- 清除 hostname
truncate -s0 /etc/hostname
- 修改/etc/issue,将 IP 显示在 console
vi /etc/issue
IP: \4{eth0} # or IP: \4
- 停用 apt 自动更新
systemctl mask apt-daily.service apt-daily-upgrade.service
- 关闭 ufw
systemctl stop ufw && systemctl disable ufw
- 清理 cloud-init
cloud-init clean && rm -rf /var/lib/cloud/*
- 清空
/etc/machine-idubuntu 默认使用/etc/machine-id 作为 dhcp identifier,如果不清空,使用相同模板创建的 vm,对应的 IP 是相同的。
echo -n > /etc/machine-id
参考:https://superuser.com/questions/1338510/wrong-ip-address-from-dhcp-client-on-ubuntu-18-04
- 清理残留 log,清理 bash history
apt clean
cat /dev/null > ~/.bash_history && history -c
history -w
- 关机
shutdown -h now
生成模板
qm template 9008
接下来就可以利用模板 通过克隆出 vm 了